7.4. Autofilled Attributes
The Autofill Attributes tab lets Organisation Administrators predefine values for specific webform fields. When users from the organisation fill out a form, these values appear automatically. Upon clicking the tab, Organisation administrators will see the following screen:

7.4.1. To Configure Autofill Attributes
1. Explore Available Attributes (left pane)
- On the left pane, use the search filter to find attributes by name or ID.
- Browse the Taxonomy Browser below to locate the desired attribute.
2. Add Attributes to the Selection
- Click 'ADD' next to the search filter.
- Only one attribute can be added at a time.
- The selected attribute will appear in the right pane (Selected Attributes).
3. Edit or Remove Attributes
- Hover over the last section of any row to reveal the 'Edit' and 'Delete' icons.
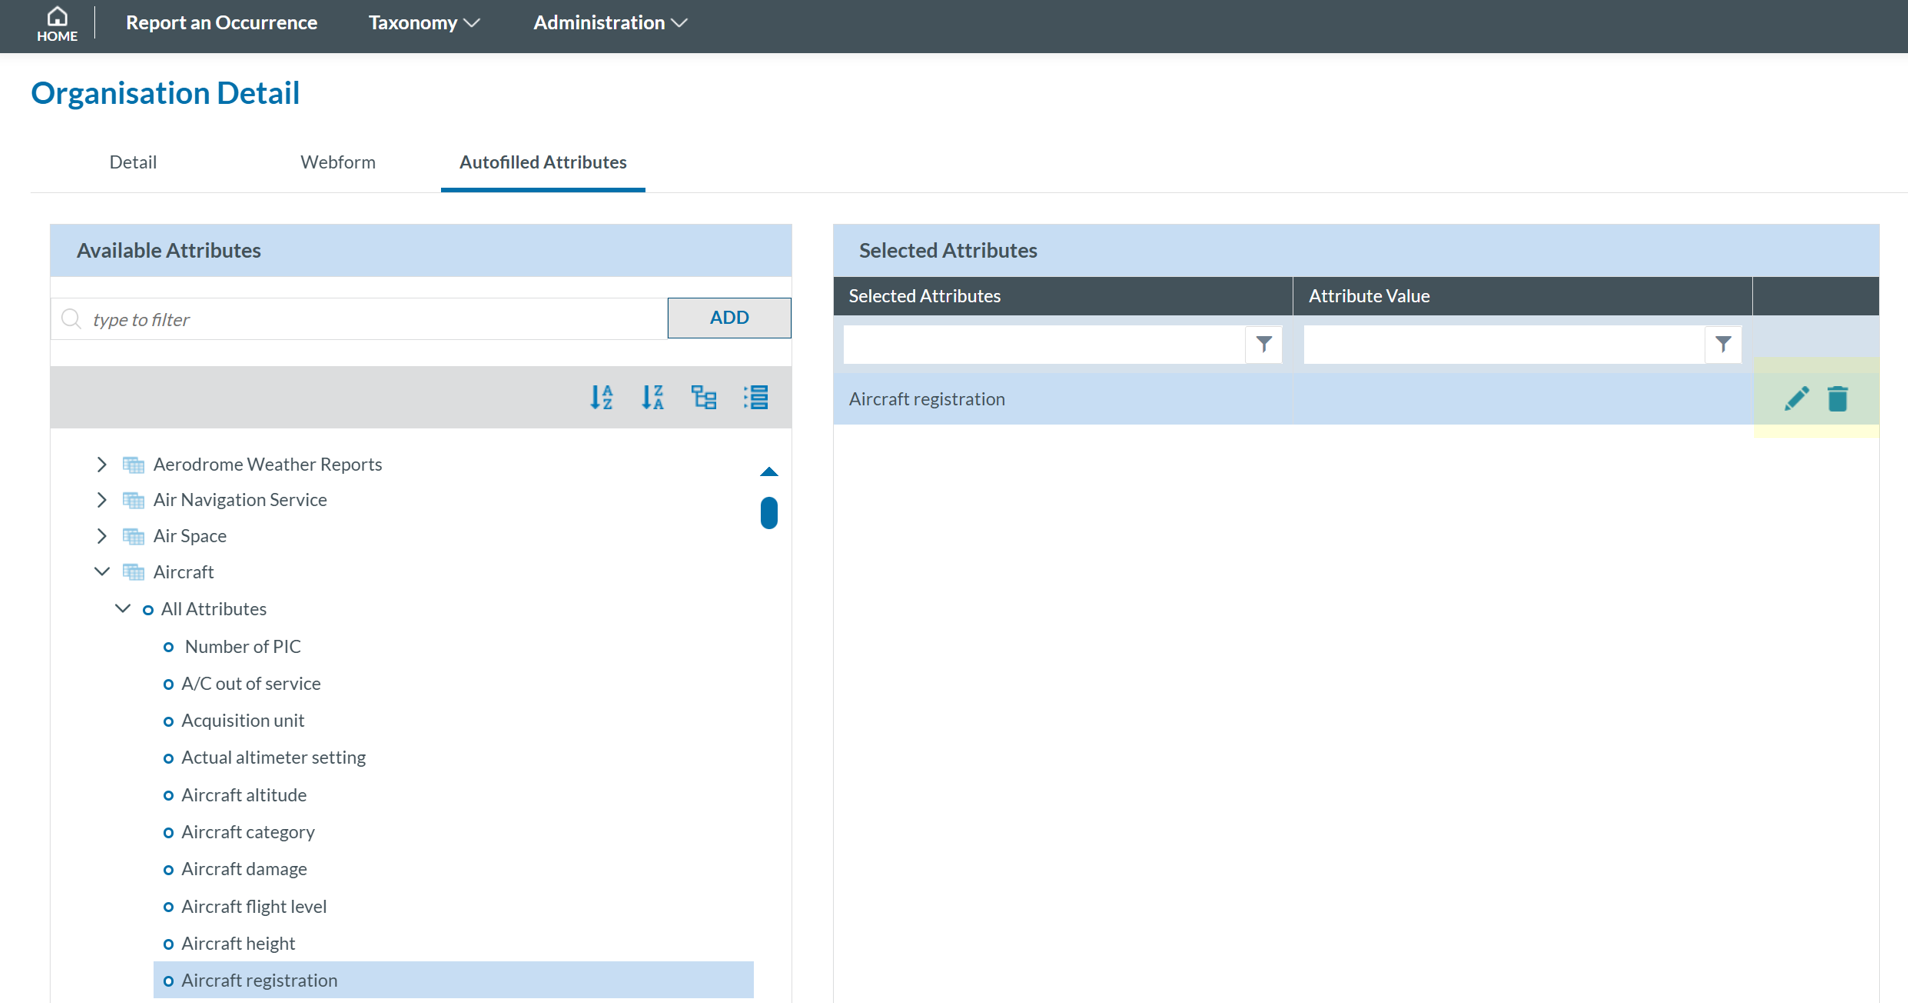
- Click 'Edit' to open the Attribute Value window 'Delete' to remove the attribute.
4. Assign a Value
- Click Select Attribute Value.
- A selection page will appear based on the attribute type.

- Choose a value and click 'SAVE'.
- The selected value will return to the Autofilled Attributes window.
5. Finalize and Save
- Once all desired attributes and values are set, click 'SAVE'.